A Guide to Seamlessly Transferring Delegation from Ethereum Mainnet to Arbitrum
Are you wondering how to smoothly transfer your delegation from Ethereum Mainnet to Arbitrum? This quick guide will walk you through the process step.


Transferring your delegation from Ethereum Mainnet to Arbitrum can be a strategic move, ensuring that you continue to receive delegation rewards. This becomes necessary when an indexer you've previously delegated to migrates their operations to Arbitrum.
Whether you've previously delegated to an indexer who has shifted operations to Arbitrum or you're simply interested in exploring the benefits of this transition, we've got you covered.
To start, visit graph.com (for this demonstration, we're using testnet.thegraph.com), and navigate to the Delegation Dashboard.

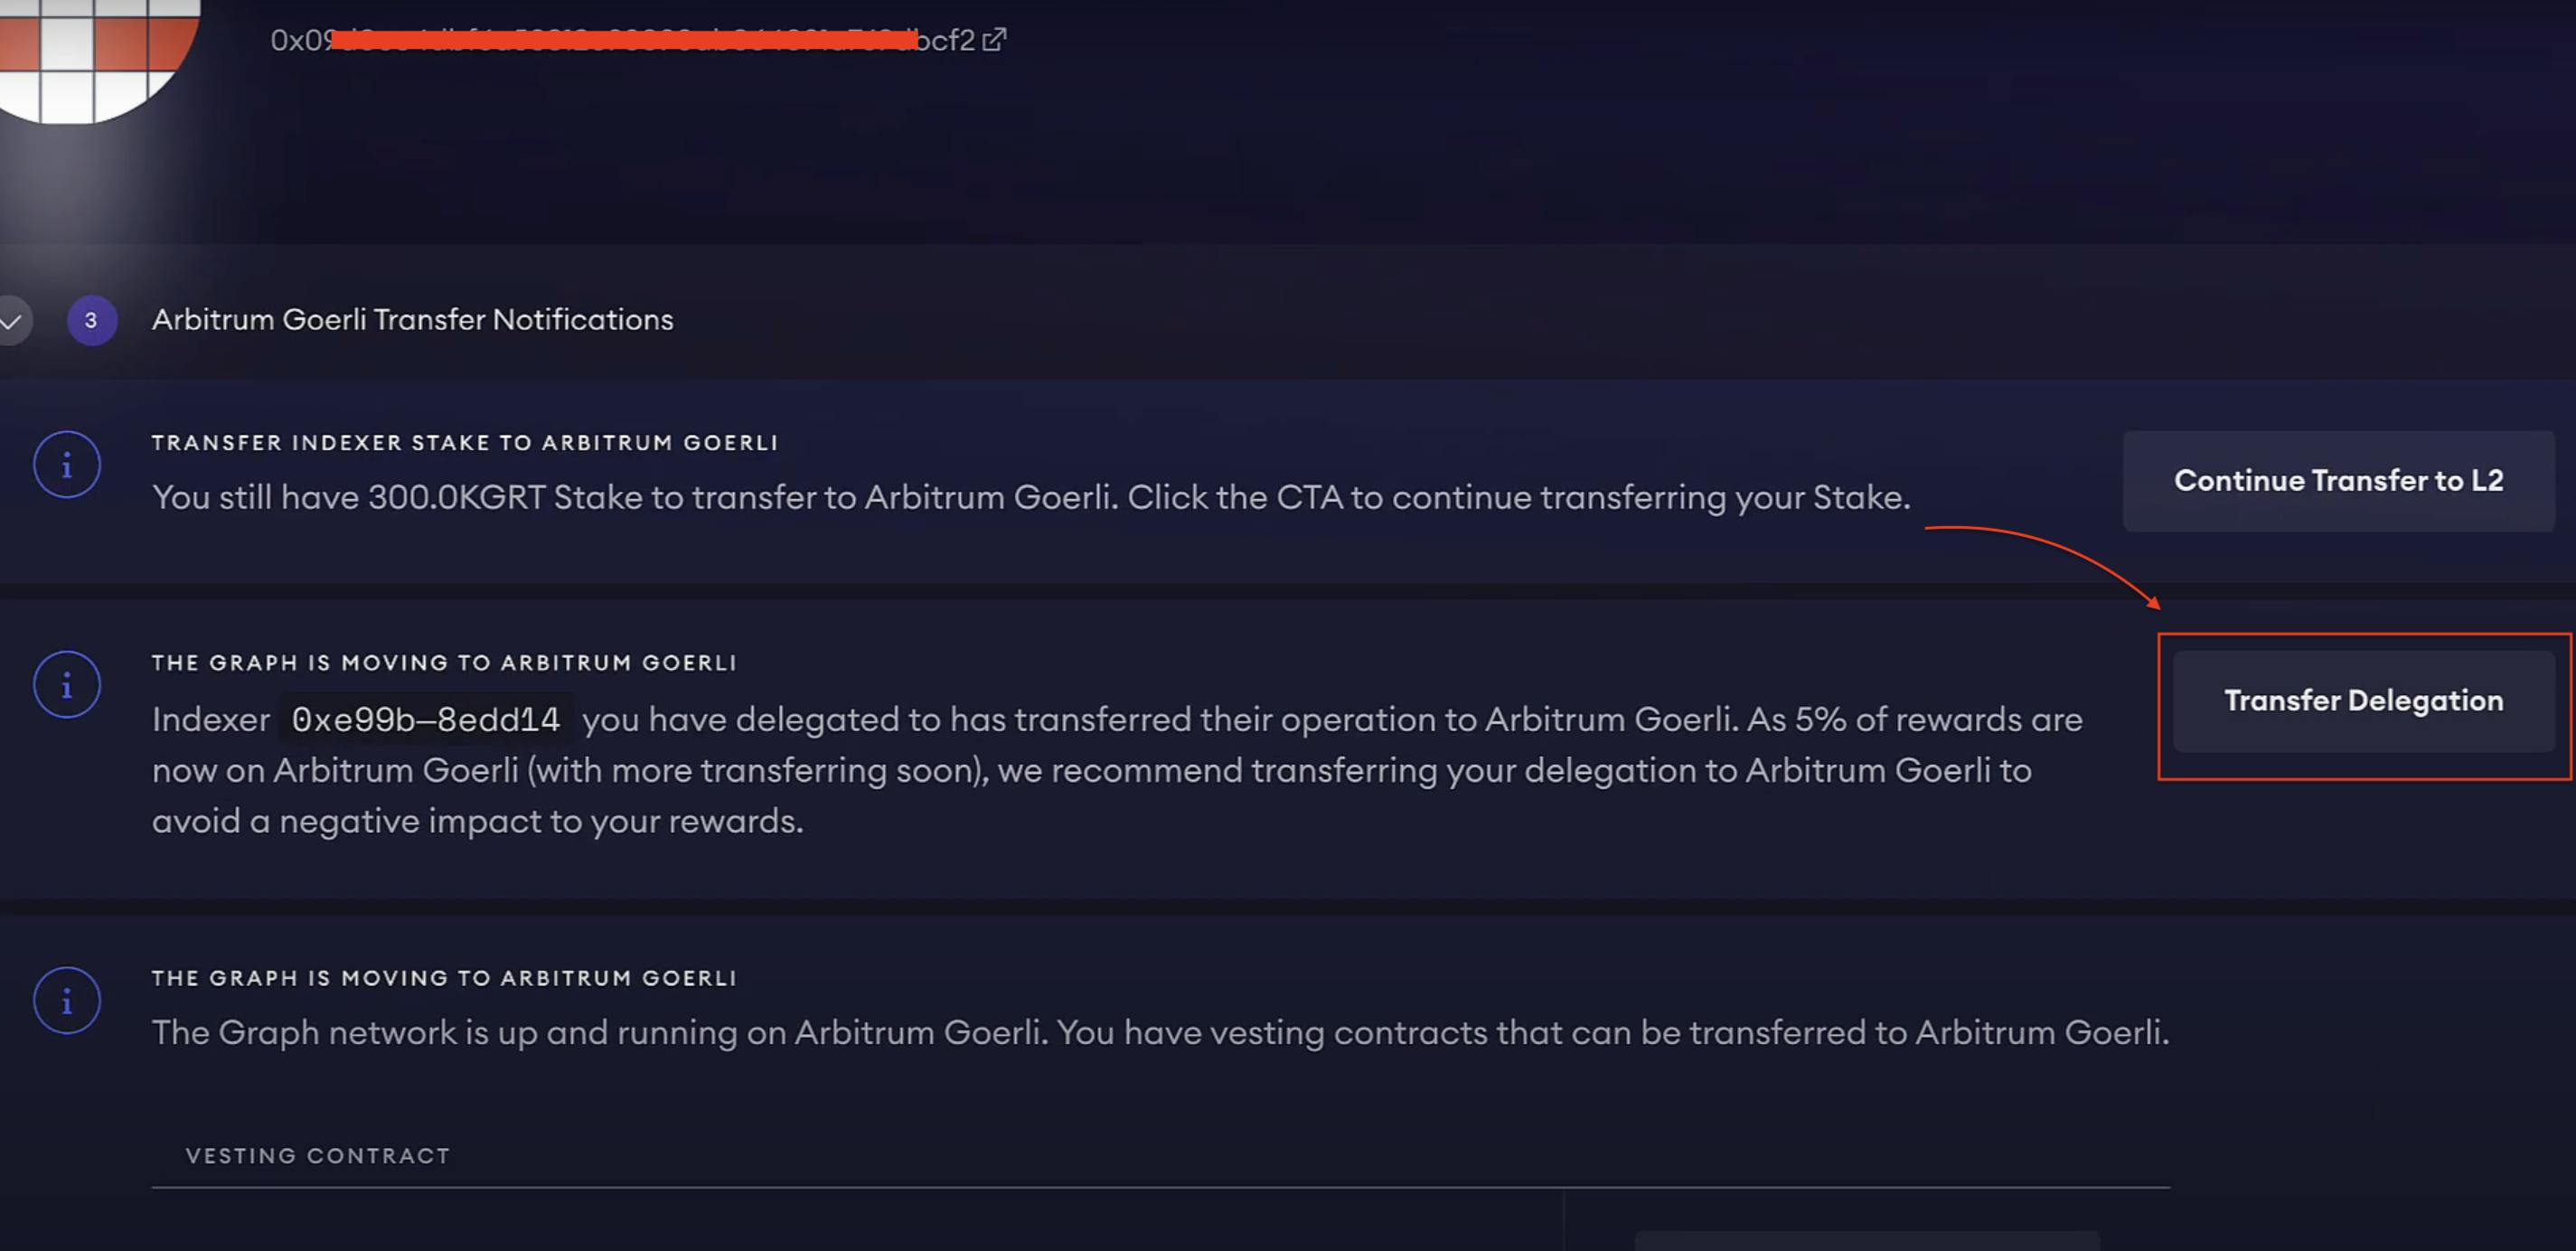
Look out for notifications. If you receive a notification indicating that an indexer you've delegated to has moved operations to Arbitrum, you're good to proceed.
Before initiating the transfer, there are a couple of crucial things to ensure:
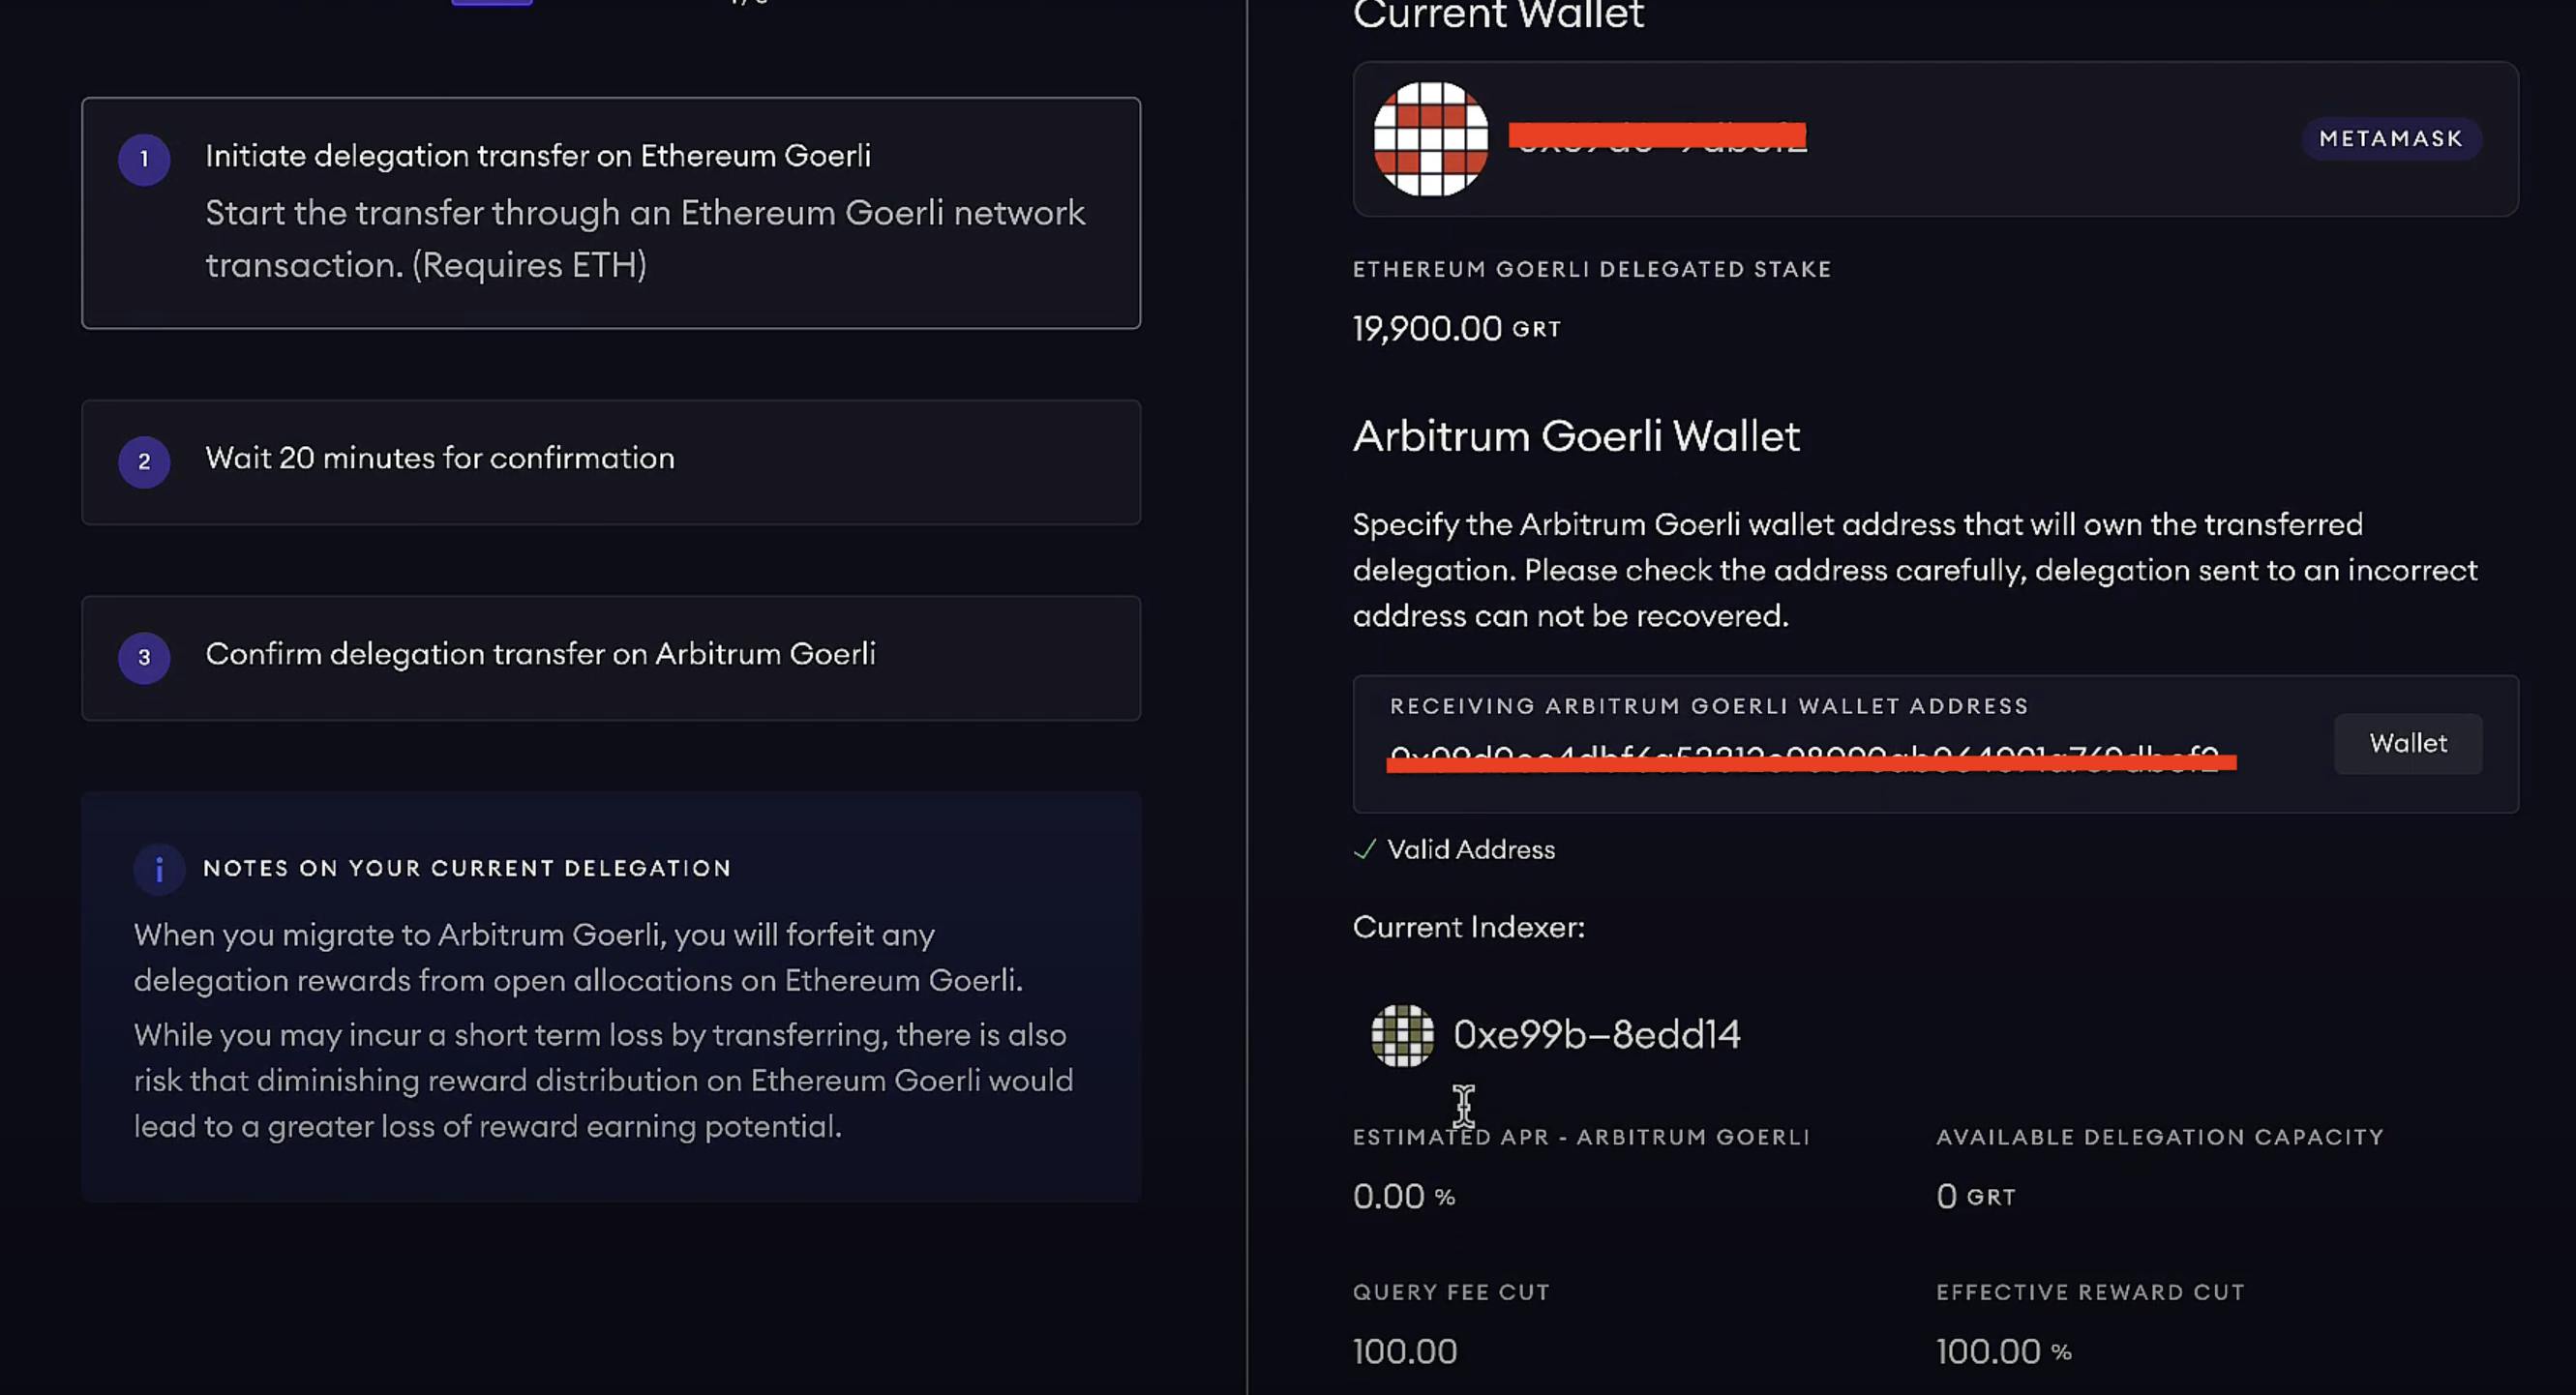
Accurate Arbitrum Wallet Address : You must have an accurate and controlled Arbitrum wallet address. Make sure you can conduct transactions with this wallet because once you enter the address into the transfer tool and submit it, you won't be able to change it. Accidentally sending your funds to a wallet you don't control would be a nightmare, so triple-check this.
Allocate Time : Set aside approximately 20 minutes for the transfer process. While it typically takes this amount of time, there might be some manual intervention required if any pop-ups appear.
Now, let's initiate the delegation transfer:
Start by clicking on "Initiate Delegation Transfer."
Wait for the transfer process to complete. Remember, it's wise to wait the full 20 minutes to handle any potential pop-ups.
After the transfer is successful, confirm the delegation transfer.
During the process, you'll notice your current wallet address auto-populated as the receiving address. This is where your funds will go. Make sure you have control over this wallet, whether it's an EOA or a multi-sig.
By this point, you'll have successfully completed the transfer. If any additional instructions appear during the process, follow them diligently. Remember, it's important to observe the transfer until the end and not skip any steps.

Thank you for taking the time to learn about L2 transfer tooling. We're excited to see your participation in the Graph ecosystem!
Connect with me here -
Twitter - twitter.com/0x_yasshhh_
LinkedIn - linkedin.com/in/yash-jagtap-46384610a
GitHub - github.com/yash251